It isn’t that often that my daughter makes desserts from mixes, however, every year since she was probably about 12, she’s made this easy dessert for our July 4th festivities (these days, she’s very much into baking everything from scratch). Oddly enough, she found this recipe in an ad in a Martha Stewart magazine, which surprises me considering that Martha is strictly a “make it from scratch” kind of gal.

Hot fudge dessert topping, 1 Oreo pie crust, 1 8oz, tub of Cool Whip, cold milk, and 2 pkg. (4 serving size each) Jello Oreo flavor instant pudding & pie filling

Set aside 2 TBSP of the fudge topping

Pour and evenly spread 1/2 Cup of the hot fudge dessert, covering the bottom of the crust (we’ve found that putting the hot fudge in the microwave for about 20 seconds, make it easier to pour and spread!)

Top and evenly spread half of the thawed whipped topping; freeze for 10 minutes

Pour 1-1/4 C cold milk into a bowl, along with the 2 pkg of pudding mix
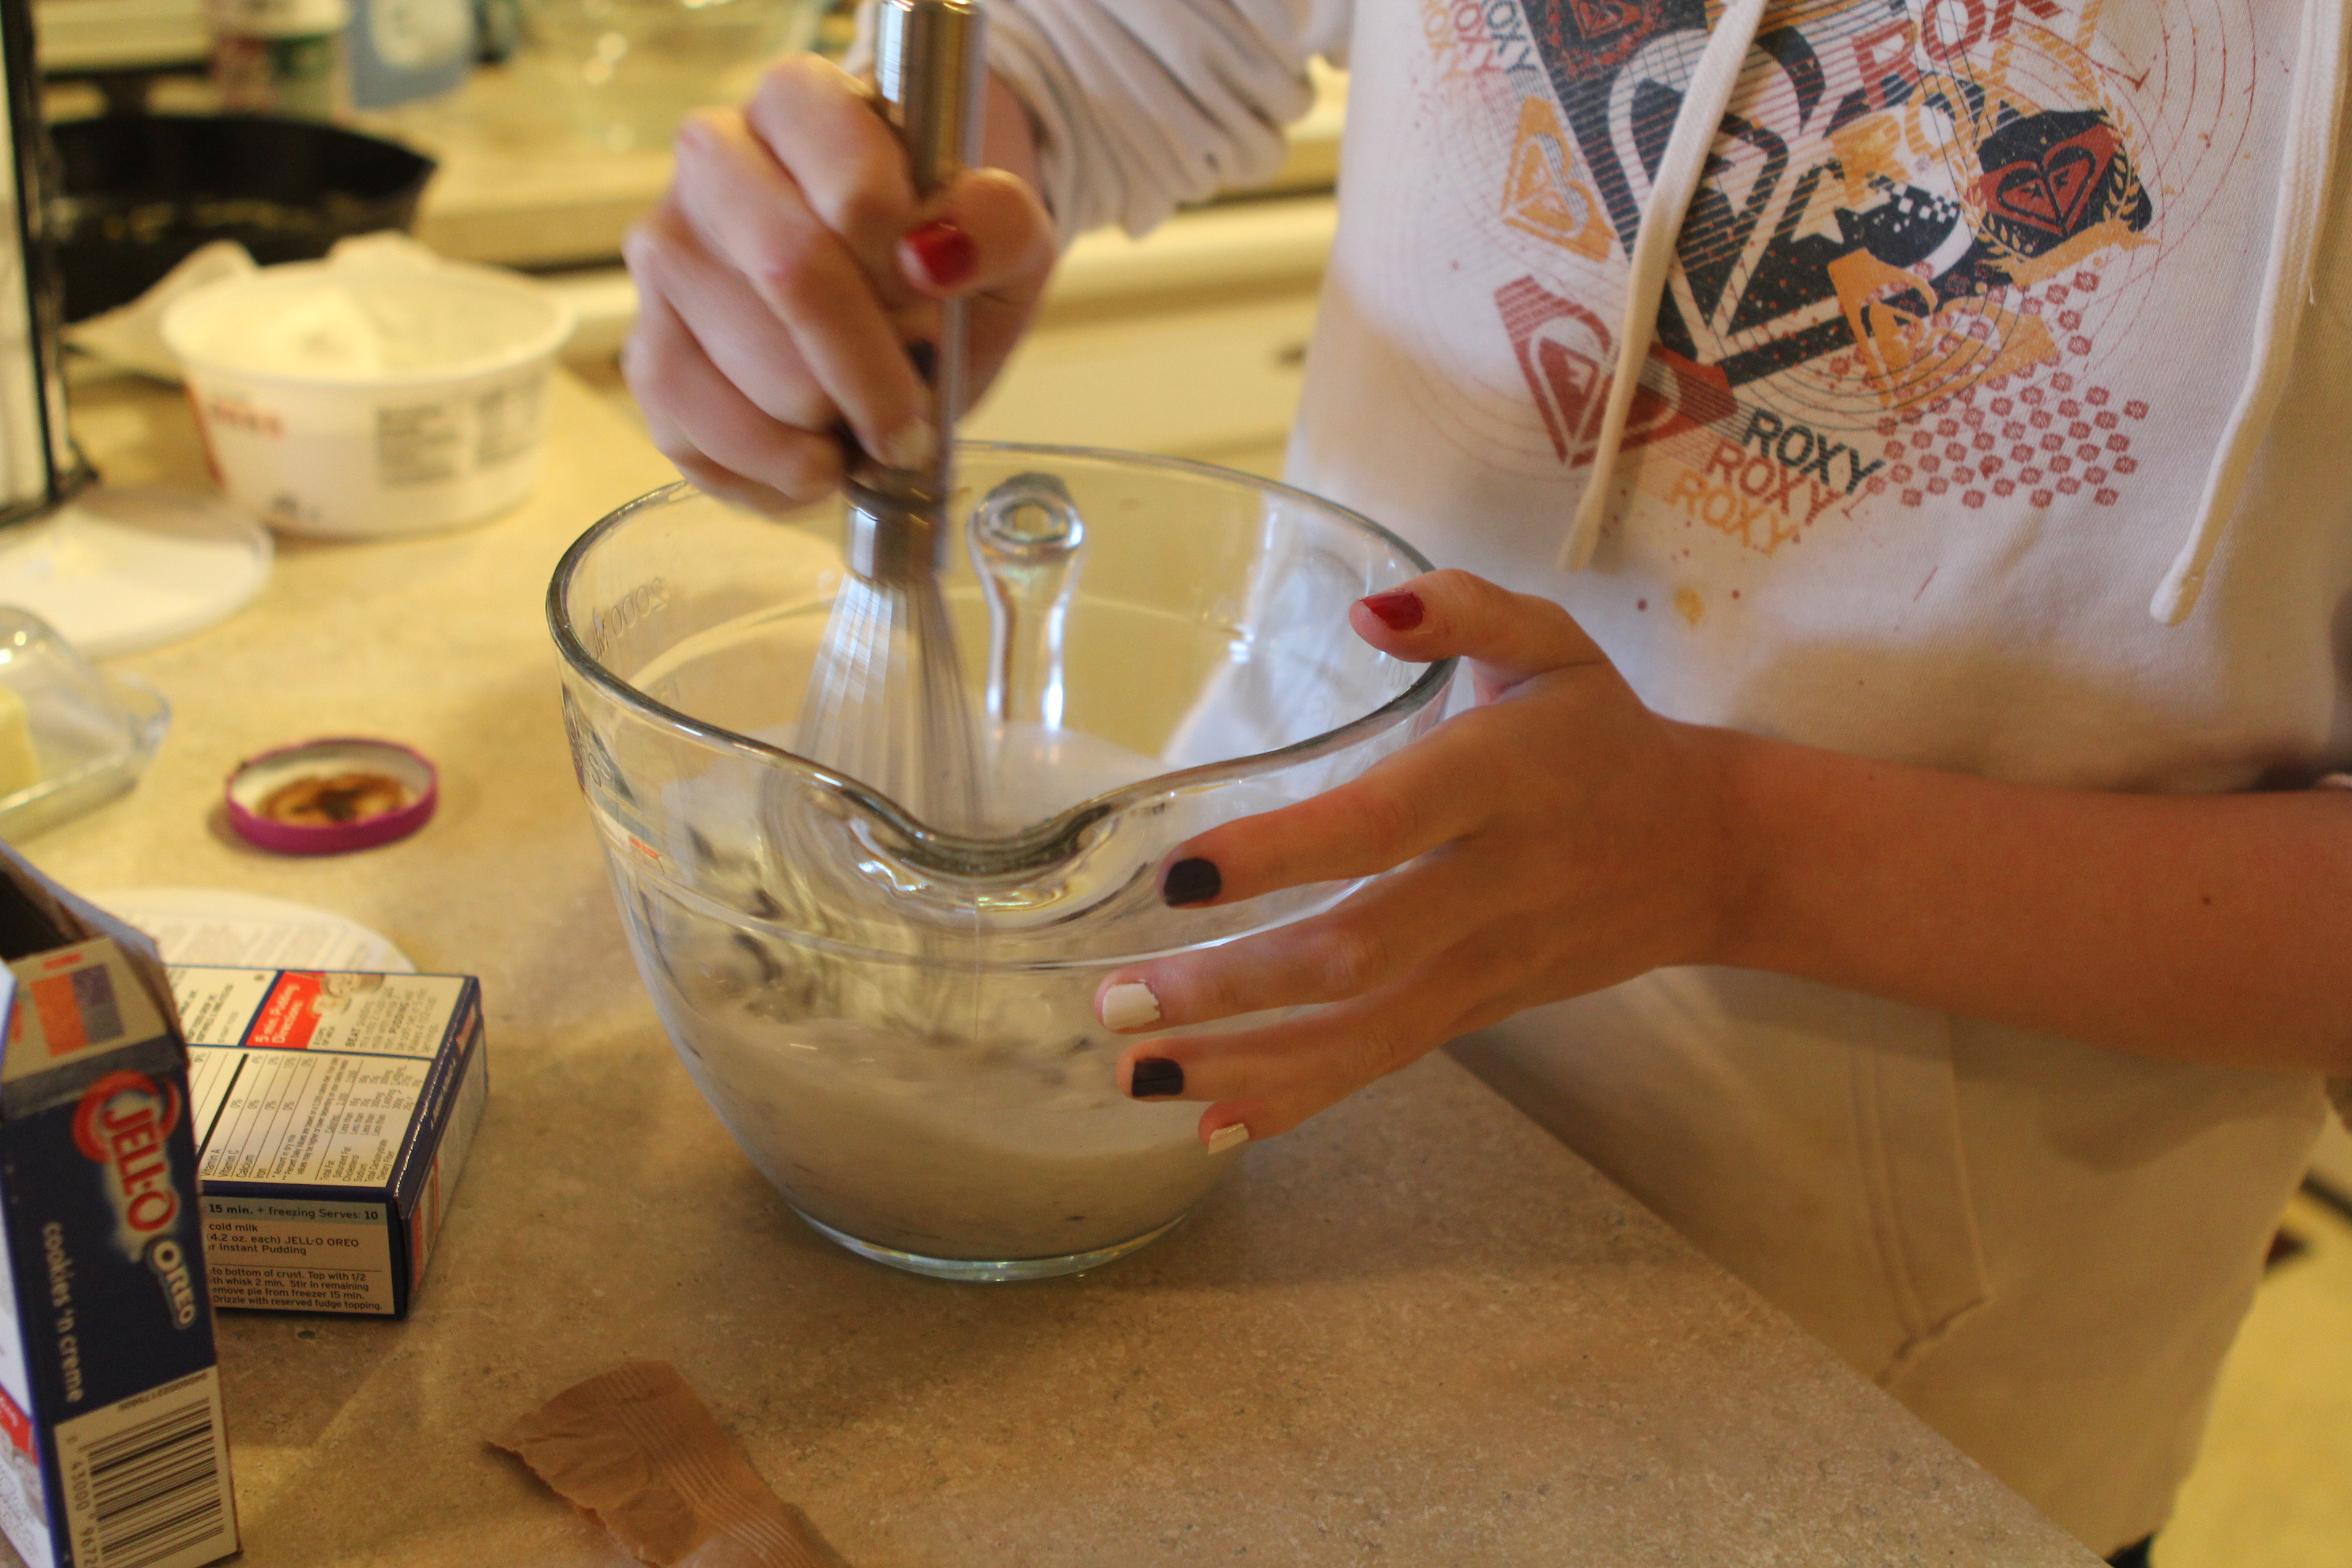
Beat with a wire whisk 2 minutes or until well blended (Mixture will be thick).

Gently stir in remaining whipped topping

Spoon mixture over whipped topping layer in crust.

Freeze 4 hours until firm
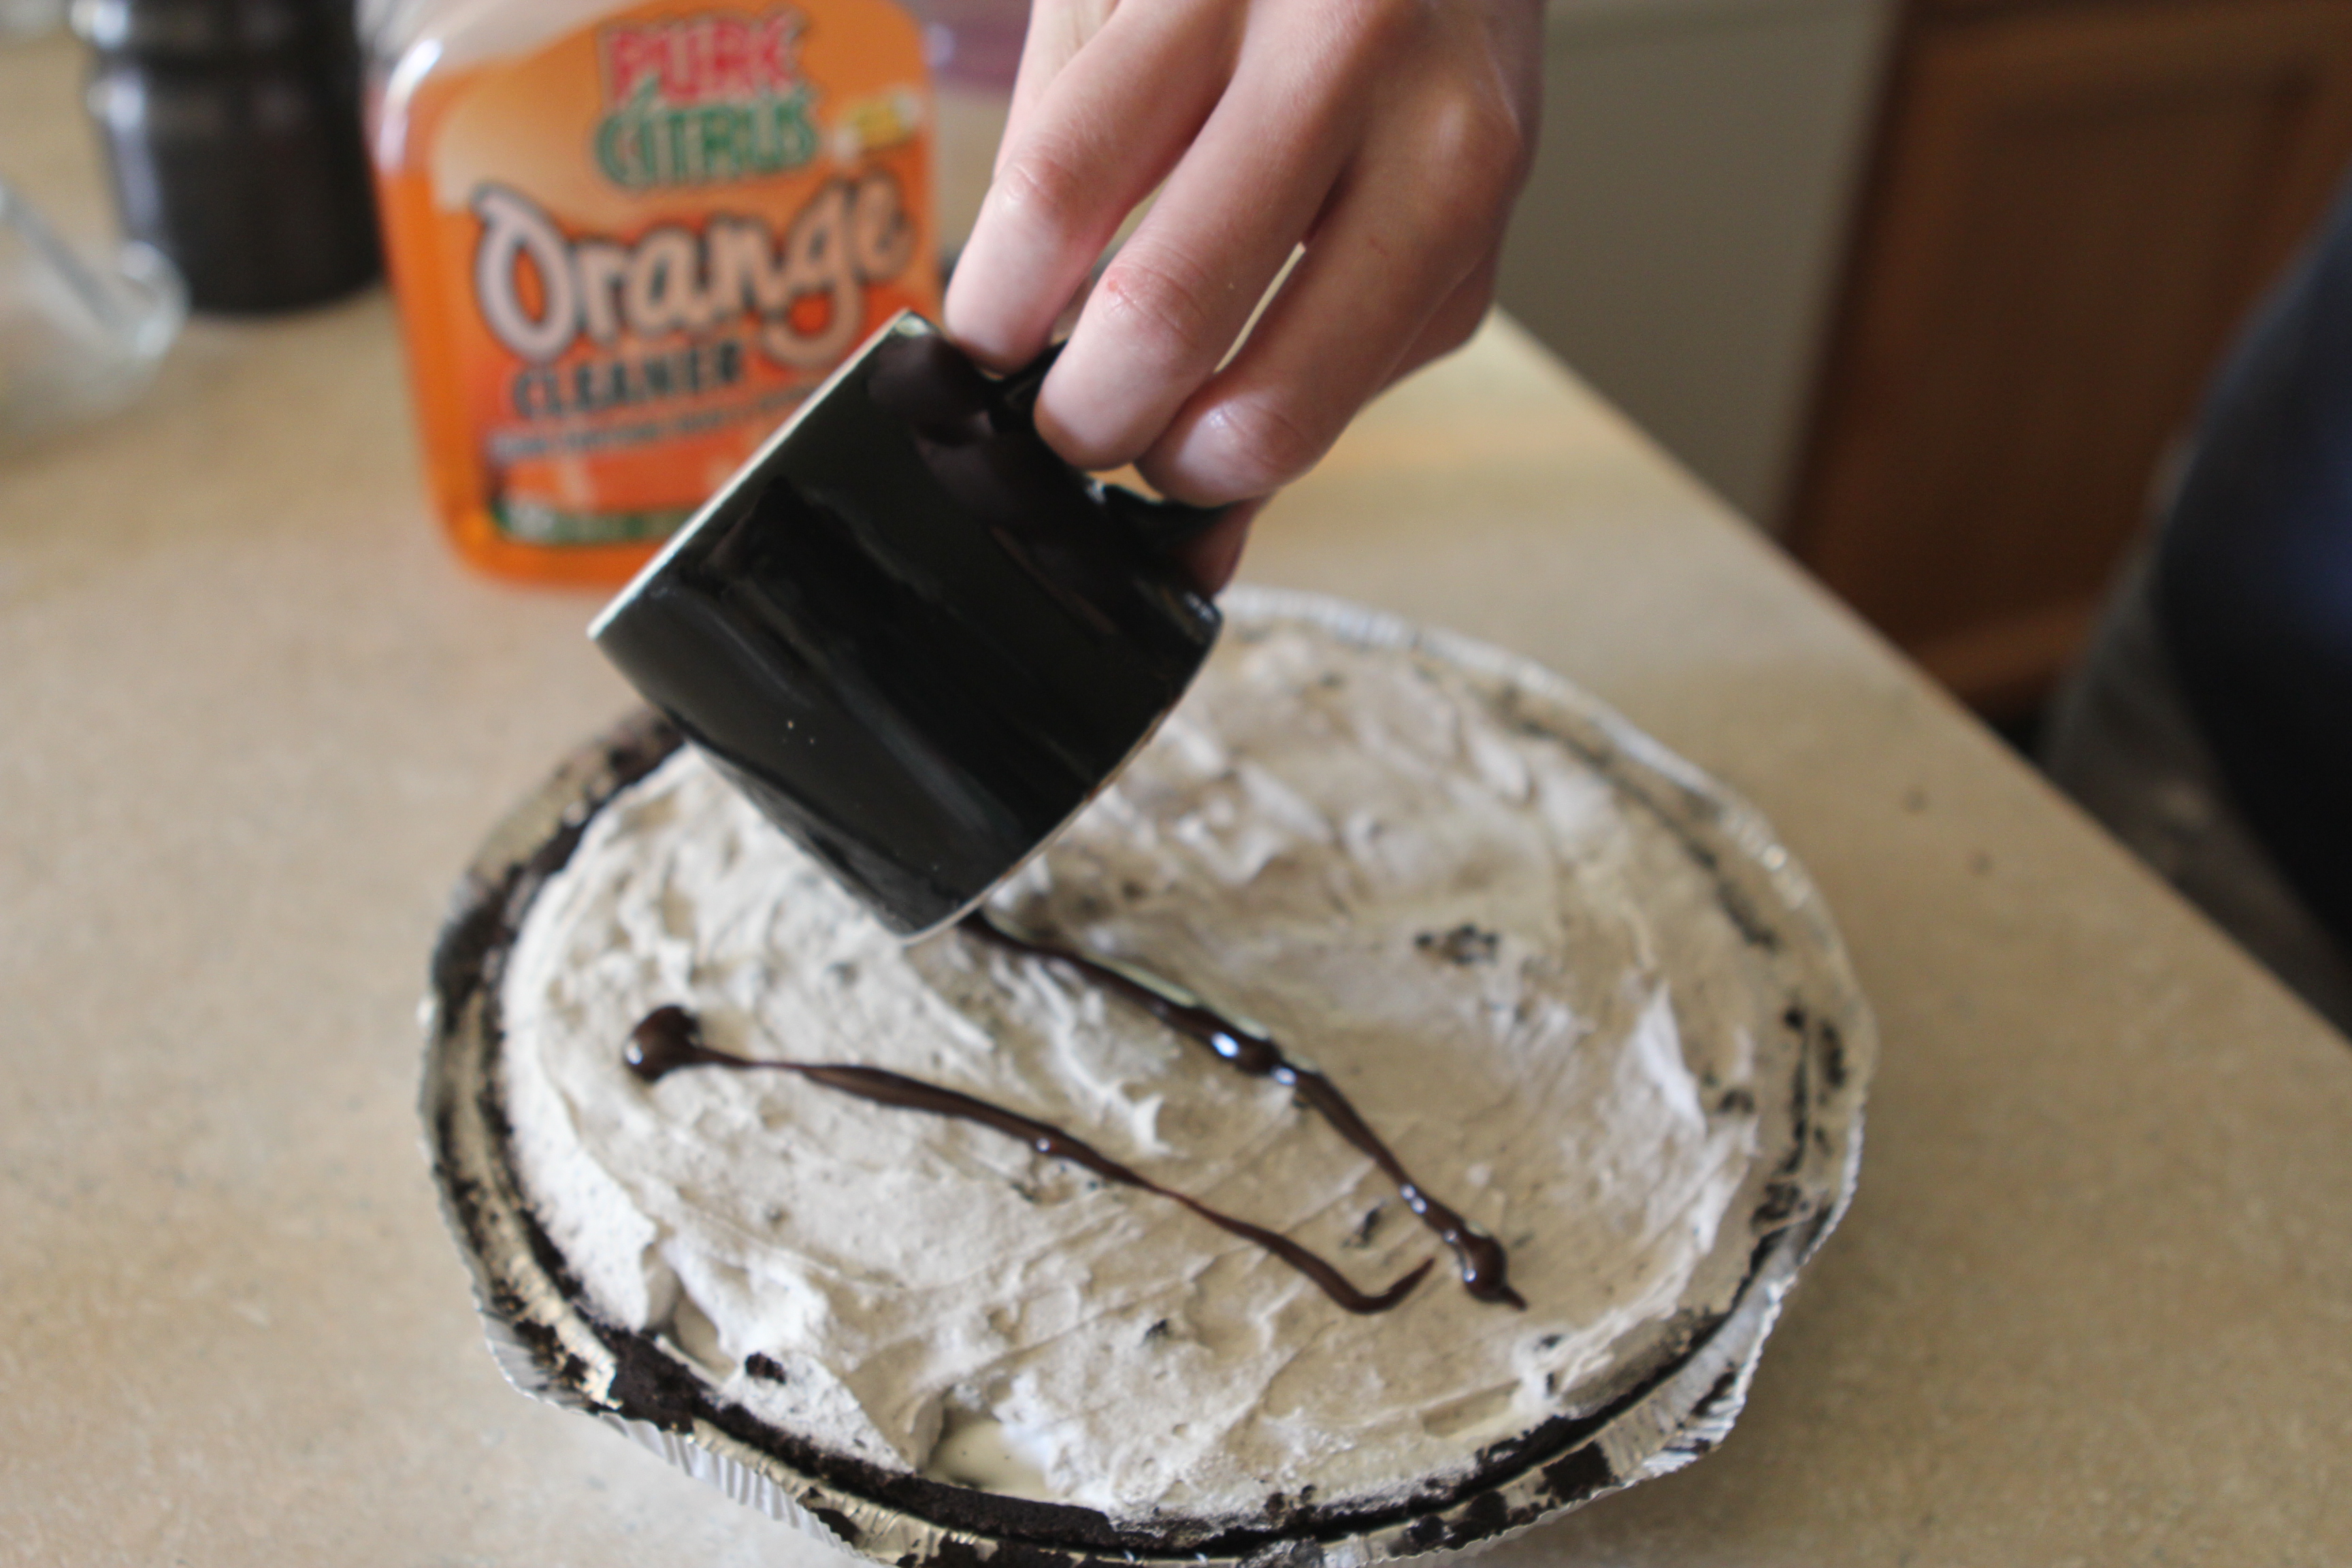
Remove pie from freezer 15 minutes before serving. Let stand at room temperature to soften slightly. Drizzle with remaining fudge topping (after you’ve nuked the topping for a few seconds)

Doesn’t this look yummy? A cold glass of milk is usually needed afterwards!
Oreon Ice Cream Shop Pie
Prep: 15 minutes + freezing
1/2 C Hot fudge dessert topping, divided
1 Oreo pie crust
1 tub (8oz) Cool Whip whipped topping, thawed and divided
1-1/4 Cups cold milk
2 pkg (4 serv. size each) Jello-Oreo flavor instant pudding & pie filling
REMOVE 2 Tbsp of the fudge topping; set aside. Spoon remaining fudge topping into crust; spread to evenly cover bottom of crust. Top with half of whipped topping; freeze 10 minutes.
POUR milk into large bowl. Add dry pudding mixes. eat with wire whisk 2 minutes or until well blended. (Mixture will be thick.) Gently stir in remaining whipped topping; spoon over whipped topping layer in crust.
FREEZE 4 hours or until firm. Remove pie from freezer 15 minutes before serving; let stand at room temperature to soften slightly. Drizzle with remaining fudge topping. Store leftover pie in freezer. Makes 10 servings (or fewer, depending on the size of pie slice that you want).